Before you start
- The Large Format plan or higher. Face sort comes with Large Format and up.
- A pageant or event gallery. Choose Many people when you make the gallery.
- STEP 1 OF 7
Turn on face matching
Open the pageant’s Settings tab and find Face matching. The first time, choose where your studio is. Tick Find faces in this event, and if asked, also tick Families agreed to face matching. Click Save settings.
Tip. Where your studio is matters, because some states have laws on face data. Face matching is not available for studios in Illinois.
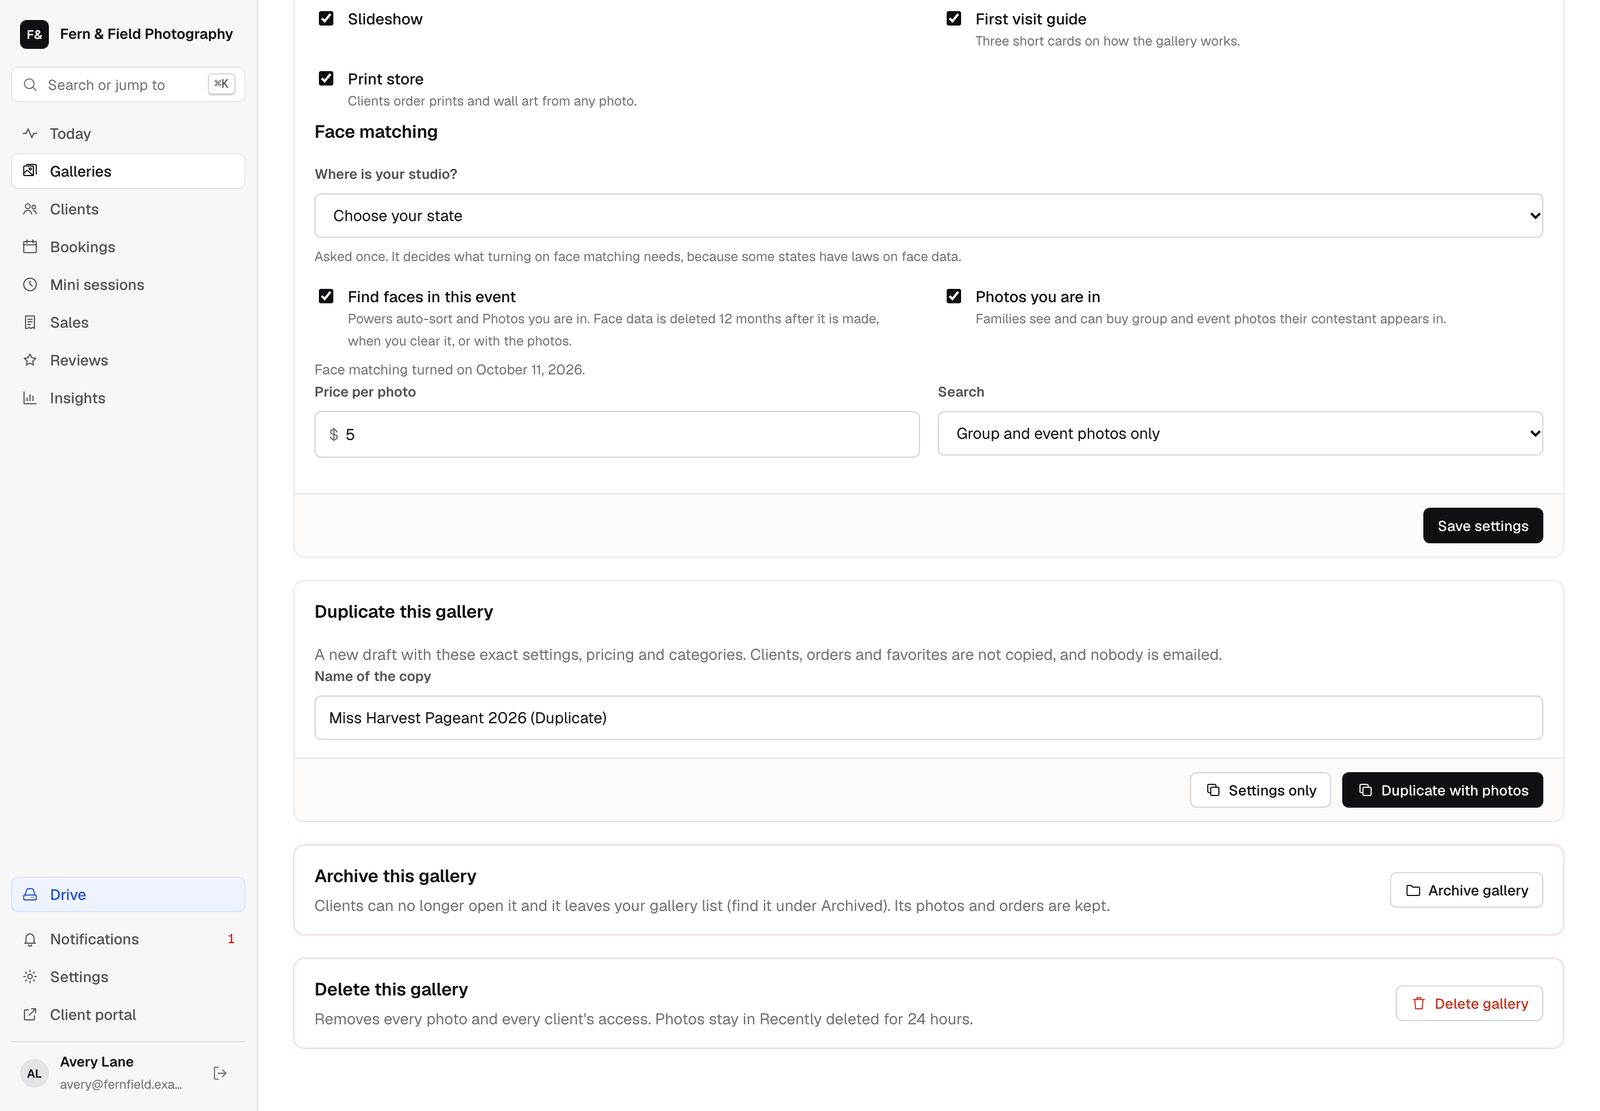
Settings tab, Face matching. - STEP 2 OF 7
Upload the event
Open the Sort tab. Click Upload folder or Upload photos, or drop the event folder on the page. Folders named after a category, like Fitness or OSQ, keep that category.
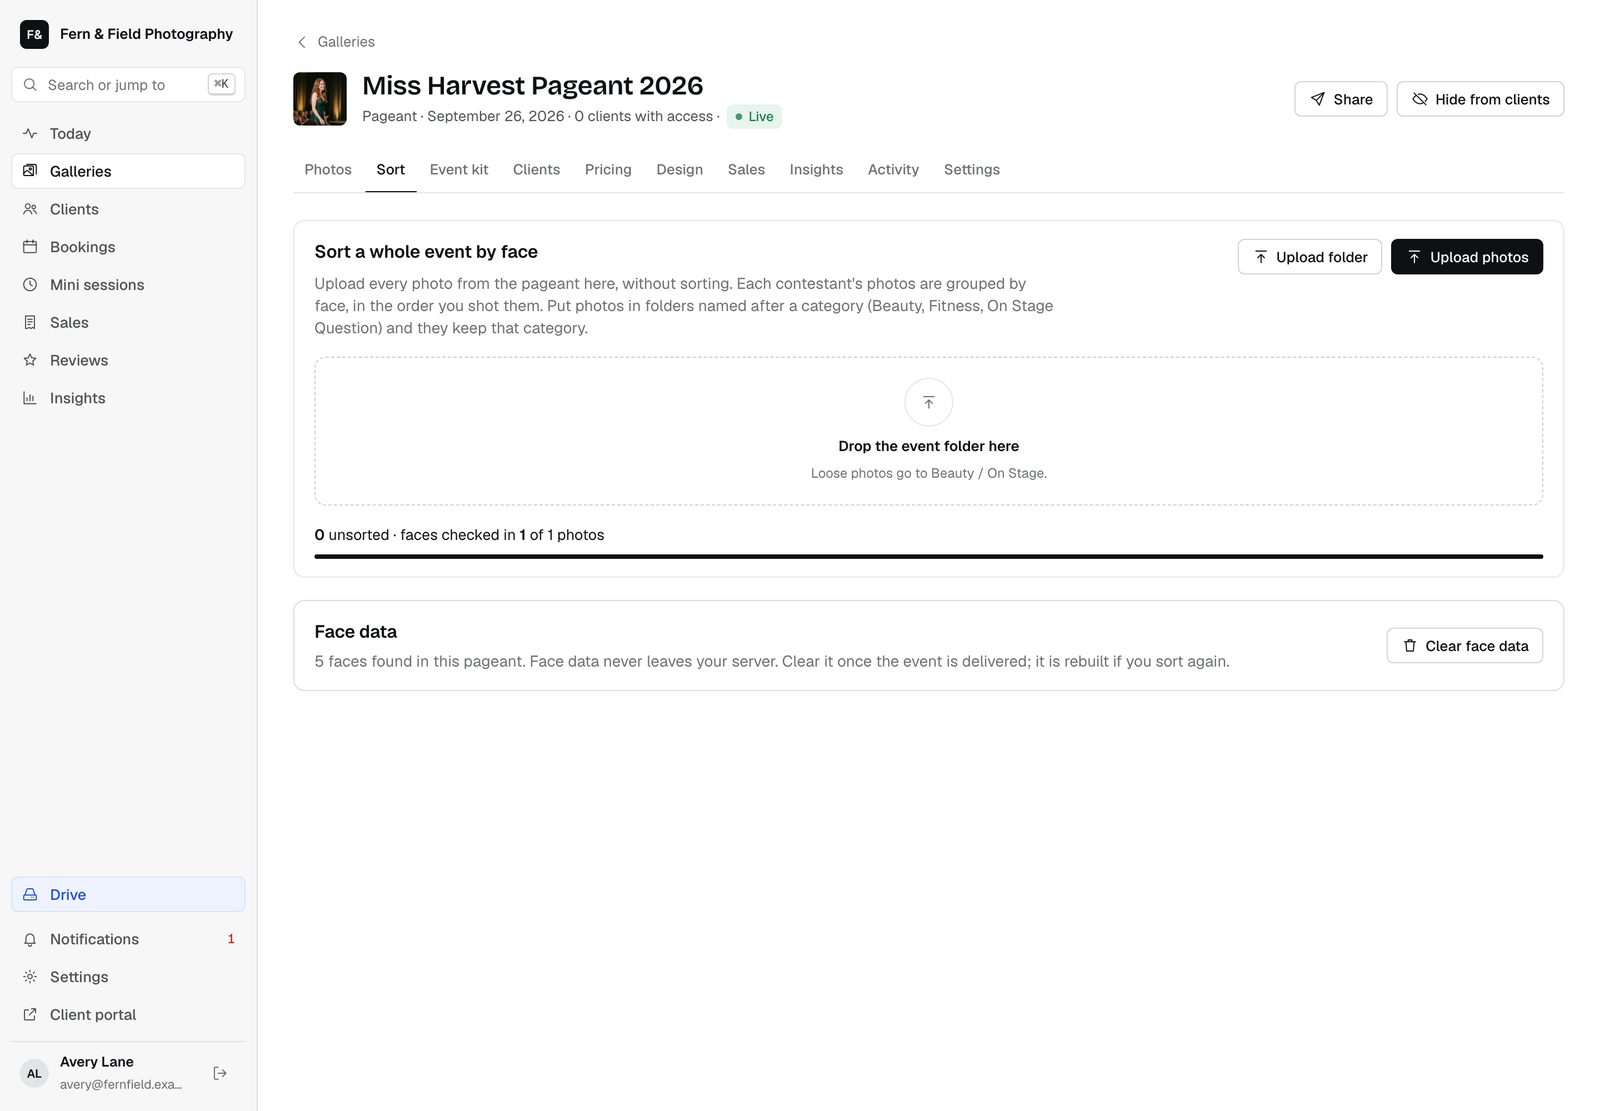
The Sort tab. - STEP 3 OF 7
Sort by face
Choose Strict, Normal or Loose matching and click Sort by face once every photo has been checked for faces.
- STEP 4 OF 7
Name each group
For each group, use Who is this to choose the contestant, Group and event photos, or New contestant. Click Review to move single photos, and merge groups that are the same person. To number unnamed groups in one go, use Number them.
- STEP 5 OF 7
Move into galleries
Click Move into galleries. Each contestant’s photos go to their own gallery.
- STEP 6 OF 7
Clear the face data
When the event is delivered, click Clear face data. Face data is deleted after 12 months anyway.
- STEP 7 OF 7
Find one person on Drive
On Drive, open a photo and click Find people, then turn on face matching. Click a face to put every photo of that person into a new folder. Only the studio owner can turn this on.
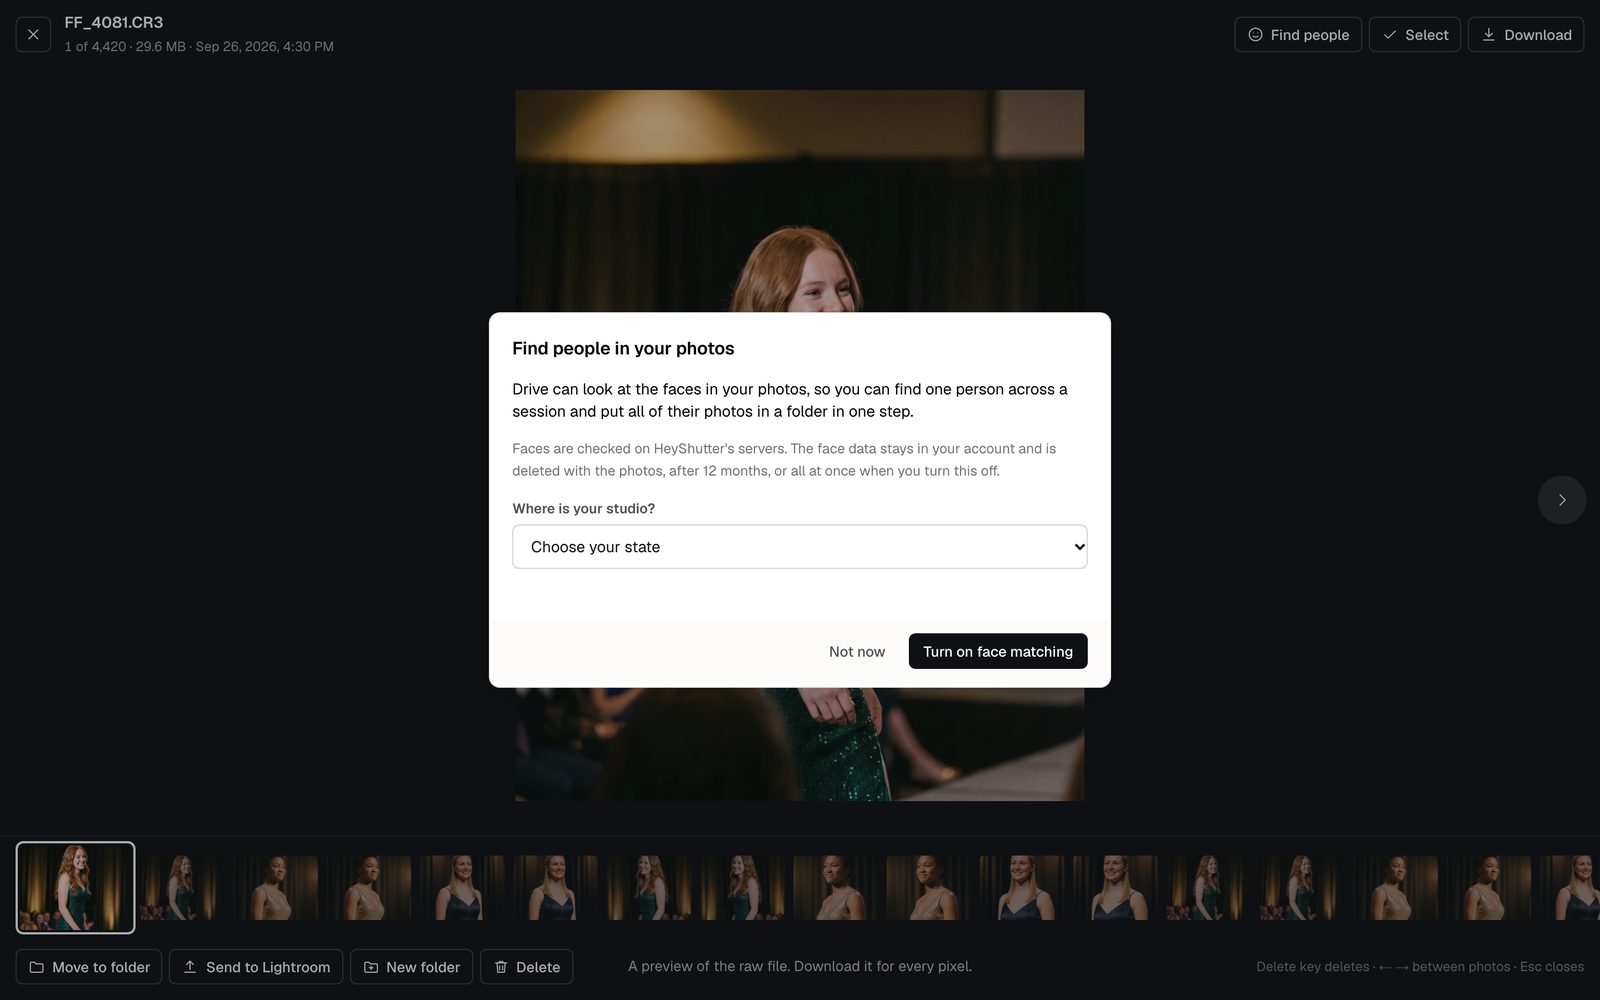
Find people on Drive.
Good to know
Questions
Why am I asked whether families agreed?
Some places, including Texas, Washington and Colorado, have laws on face data. Studios there, and outside the US, confirm families agreed before face matching turns on.
Does it work for any gallery?
Sorting by face is for pageant and event galleries, made with Many people.
Stuck? Email [email protected] with a screenshot, or open Support from inside HeyShutter.