Before you start
- A gallery with photos. See Create and share a client gallery.
- STEP 1 OF 7
Pick how it sells
When you make a gallery, choose Standard for one package, Custom packages to sell in parts like Beauty, On Stage and Talent, or Many people for pageants and events, with a gallery for each contestant.
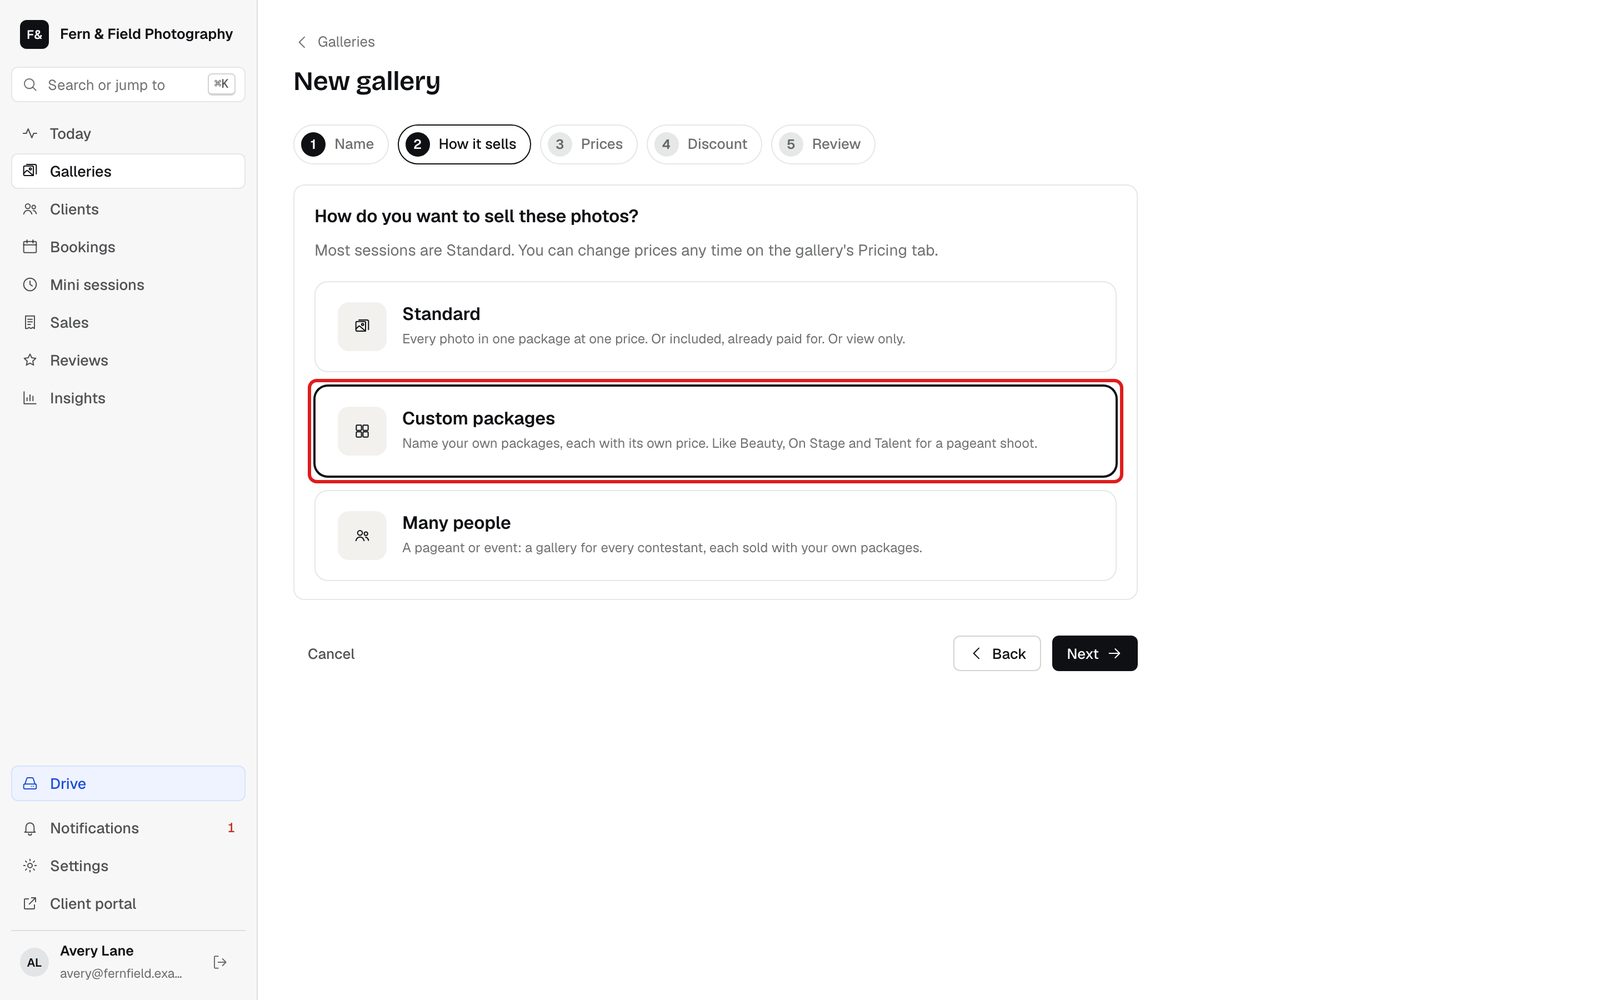
New gallery, step 2. - STEP 2 OF 7
Set prices on the Pricing tab
Open the gallery’s Pricing tab. Under How clients receive their photos, choose Sell a collection. Set the collection name and price and the add-on category price. Choose whether add-ons need the collection and whether previews are watermarked.
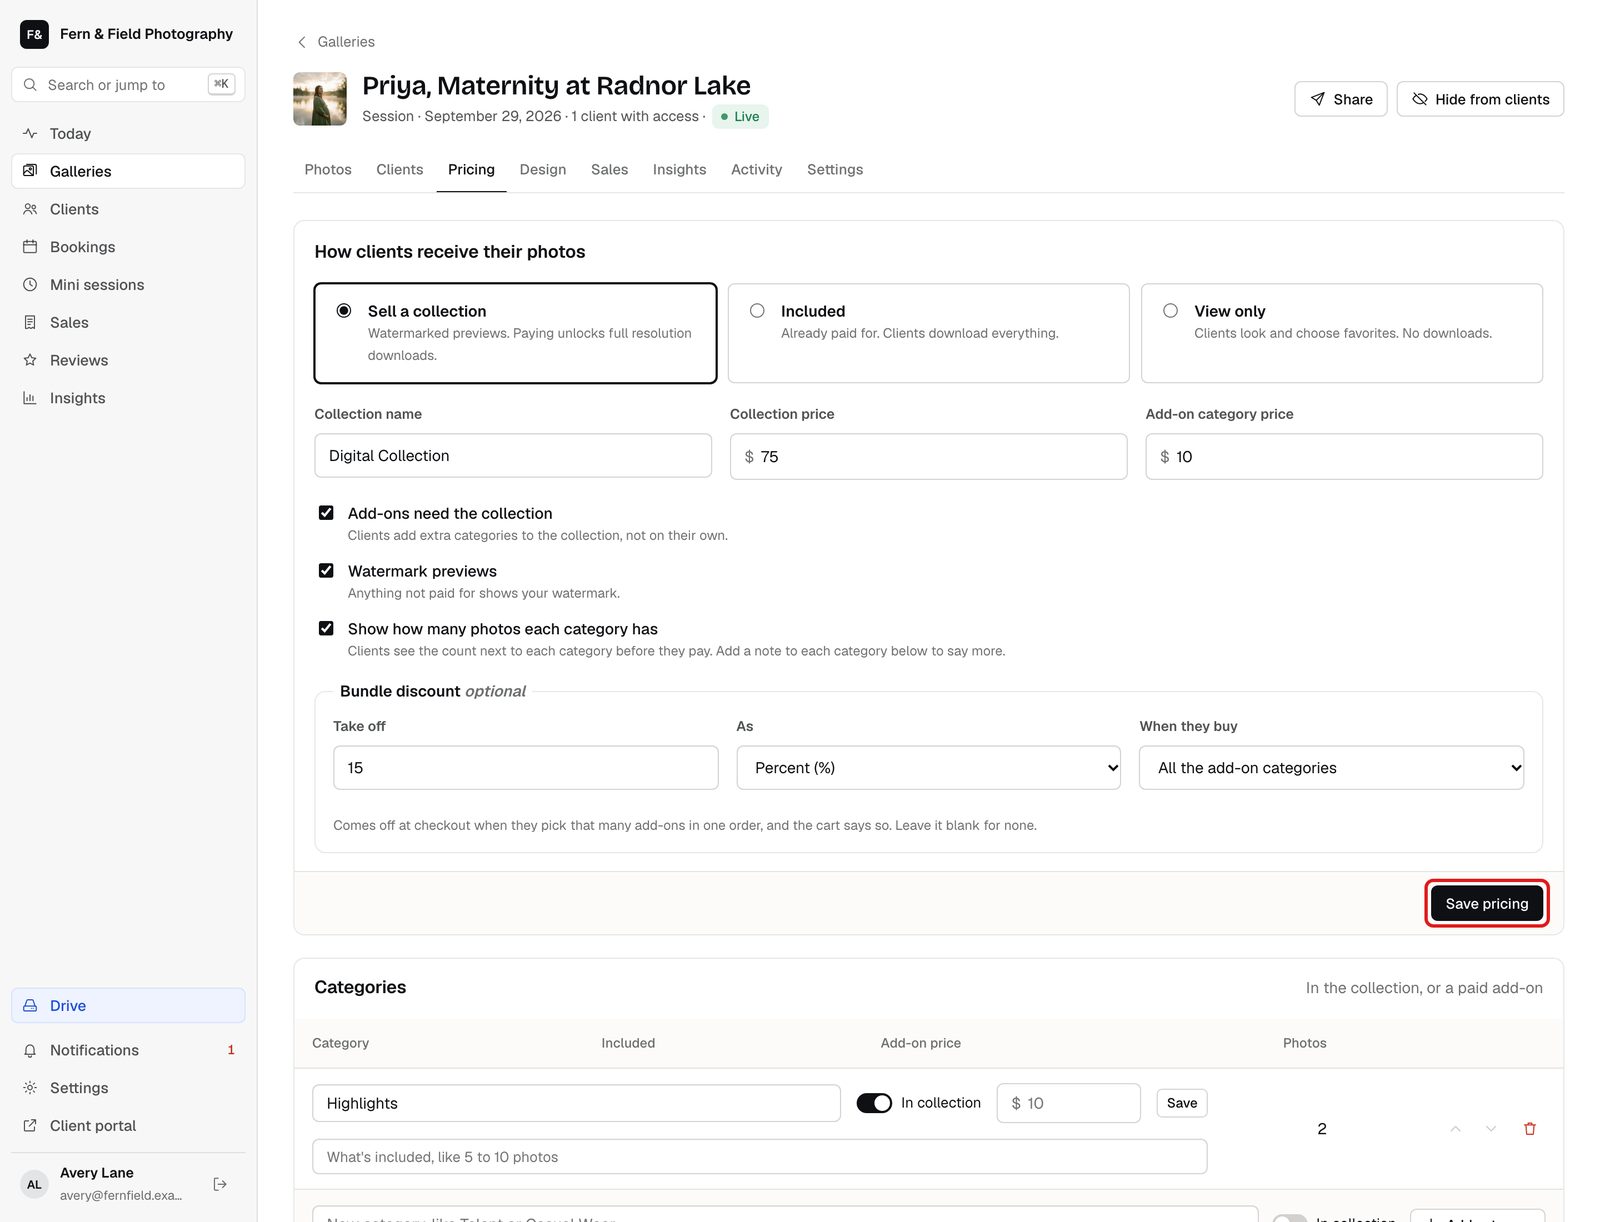
The Pricing tab. - STEP 3 OF 7
Add a bundle discount
Under Bundle discount, enter what to take off, as dollars or a percent, and when it applies: all the add-on categories, or 2 to 5 or more of them. Click Save pricing.
Tip. Percent discounts go up to 90% and come off the add-ons only.
- STEP 4 OF 7
Set up categories
Under Categories, each one is either in the collection or a paid add-on. Add a note like 5 to 10 photos so clients know what they get. Type a new one and click Add category.
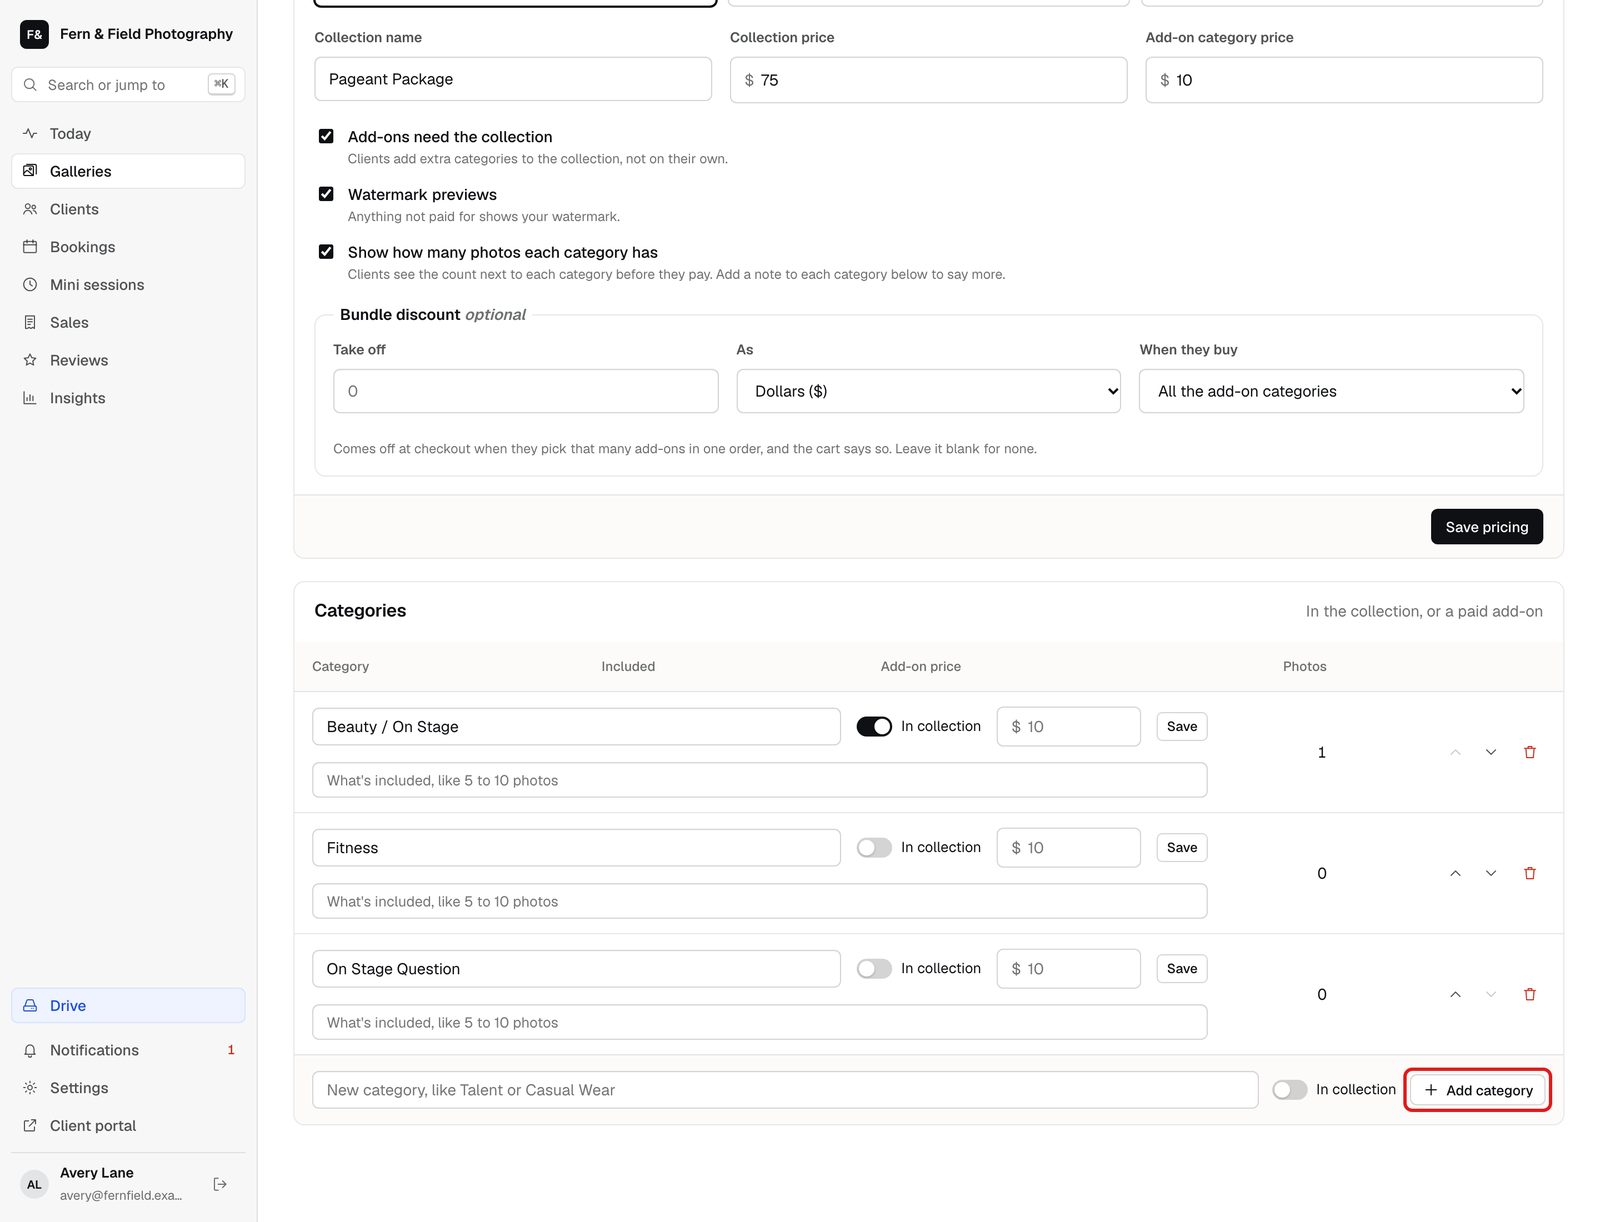
Categories on a pageant gallery. - STEP 5 OF 7
Put photos in categories
On the Photos tab, tick photos and choose a category from Move to category.
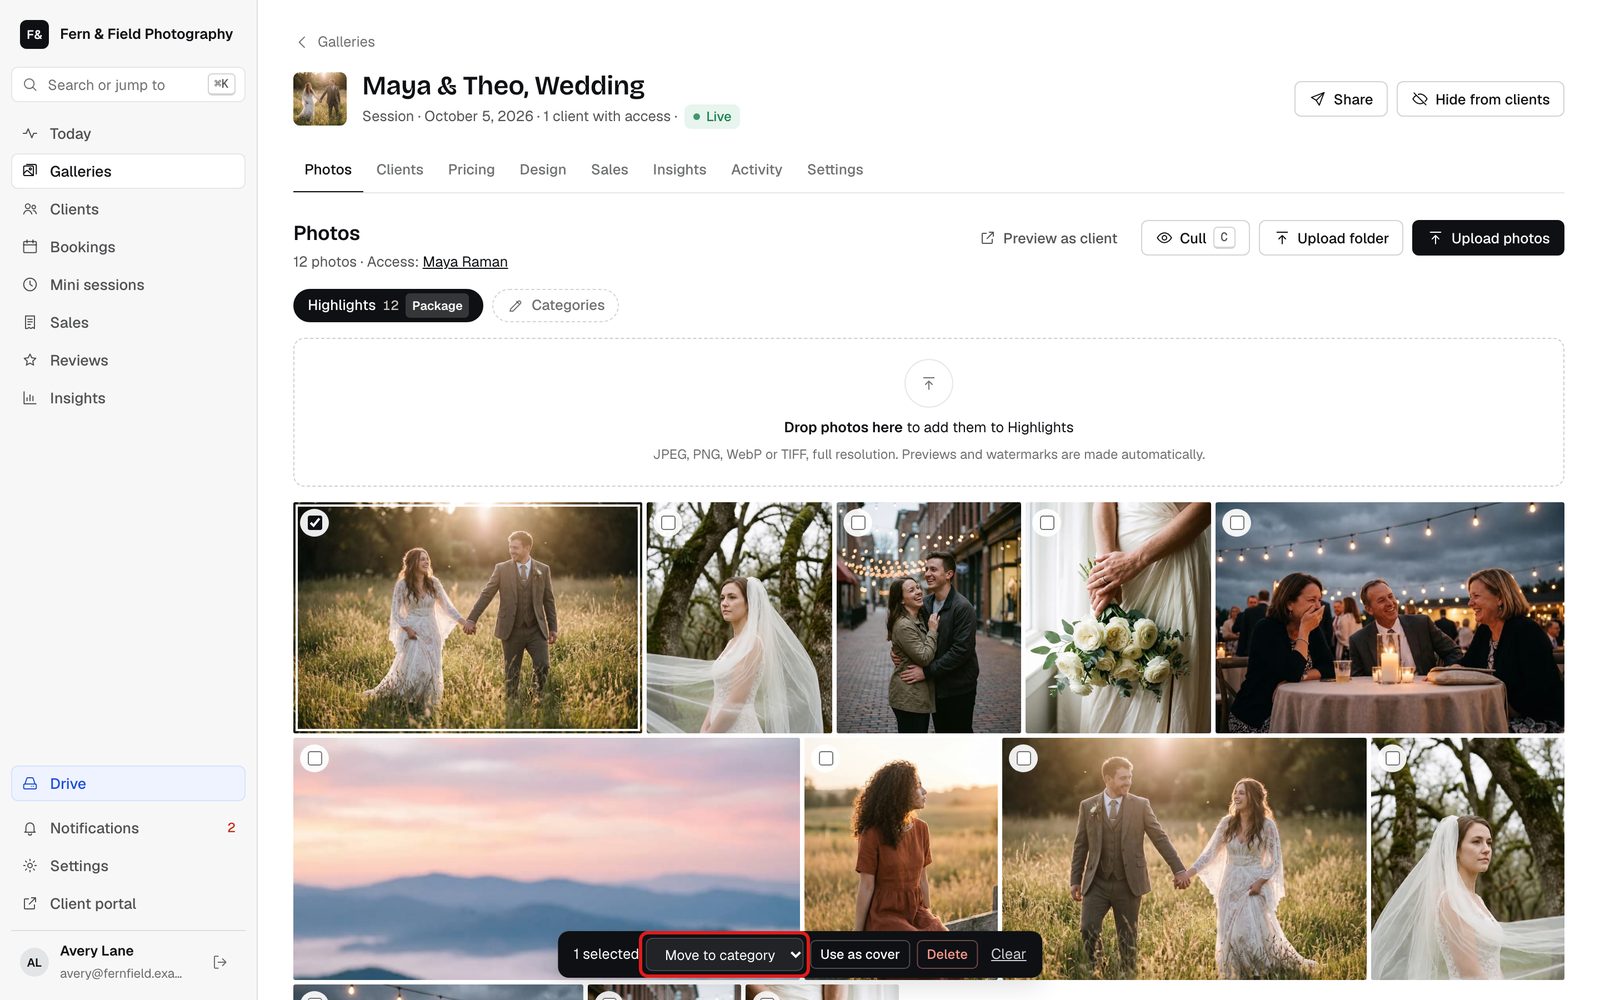
Move photos between categories. - STEP 6 OF 7
Check your purchase terms
Clients agree to your purchase terms before they pay. It is on by default with HeyShutter’s sample terms. Edit them under Settings, Defaults.
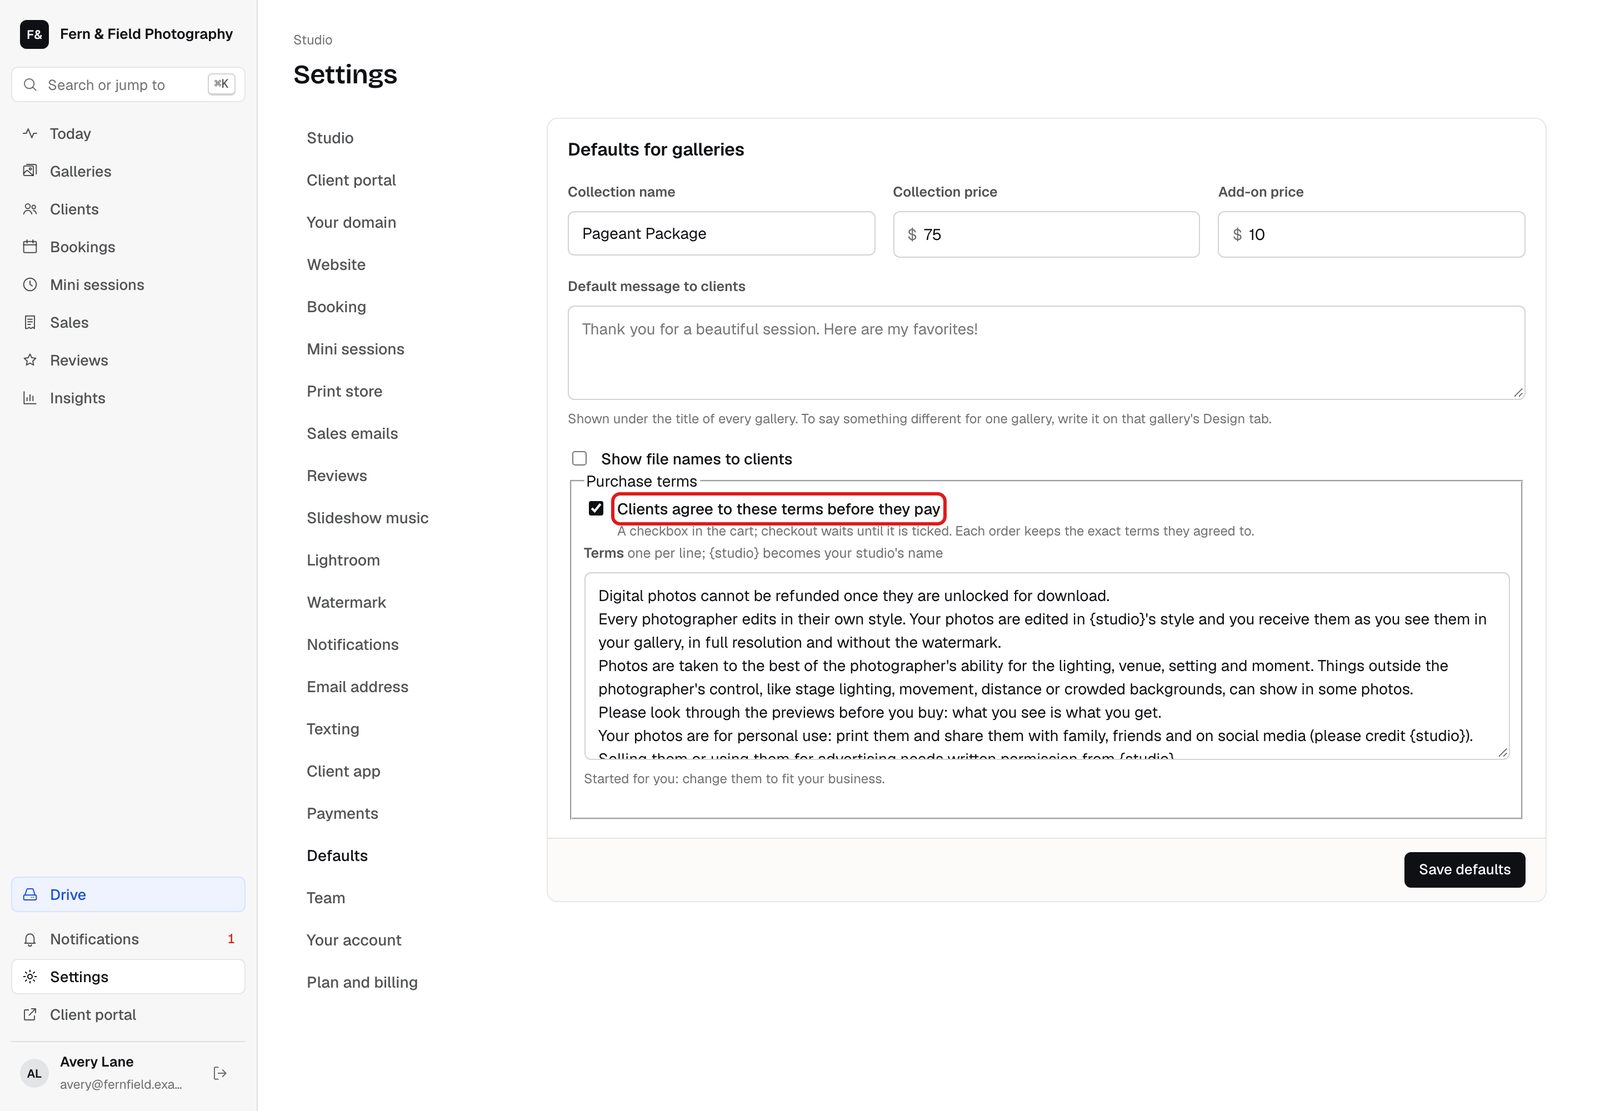
Settings, Defaults. - STEP 7 OF 7
What your client sees
The client clicks Choose your photos, picks the collection and any add-ons, sees any bundle saving and the total, agrees to your terms and checks out.
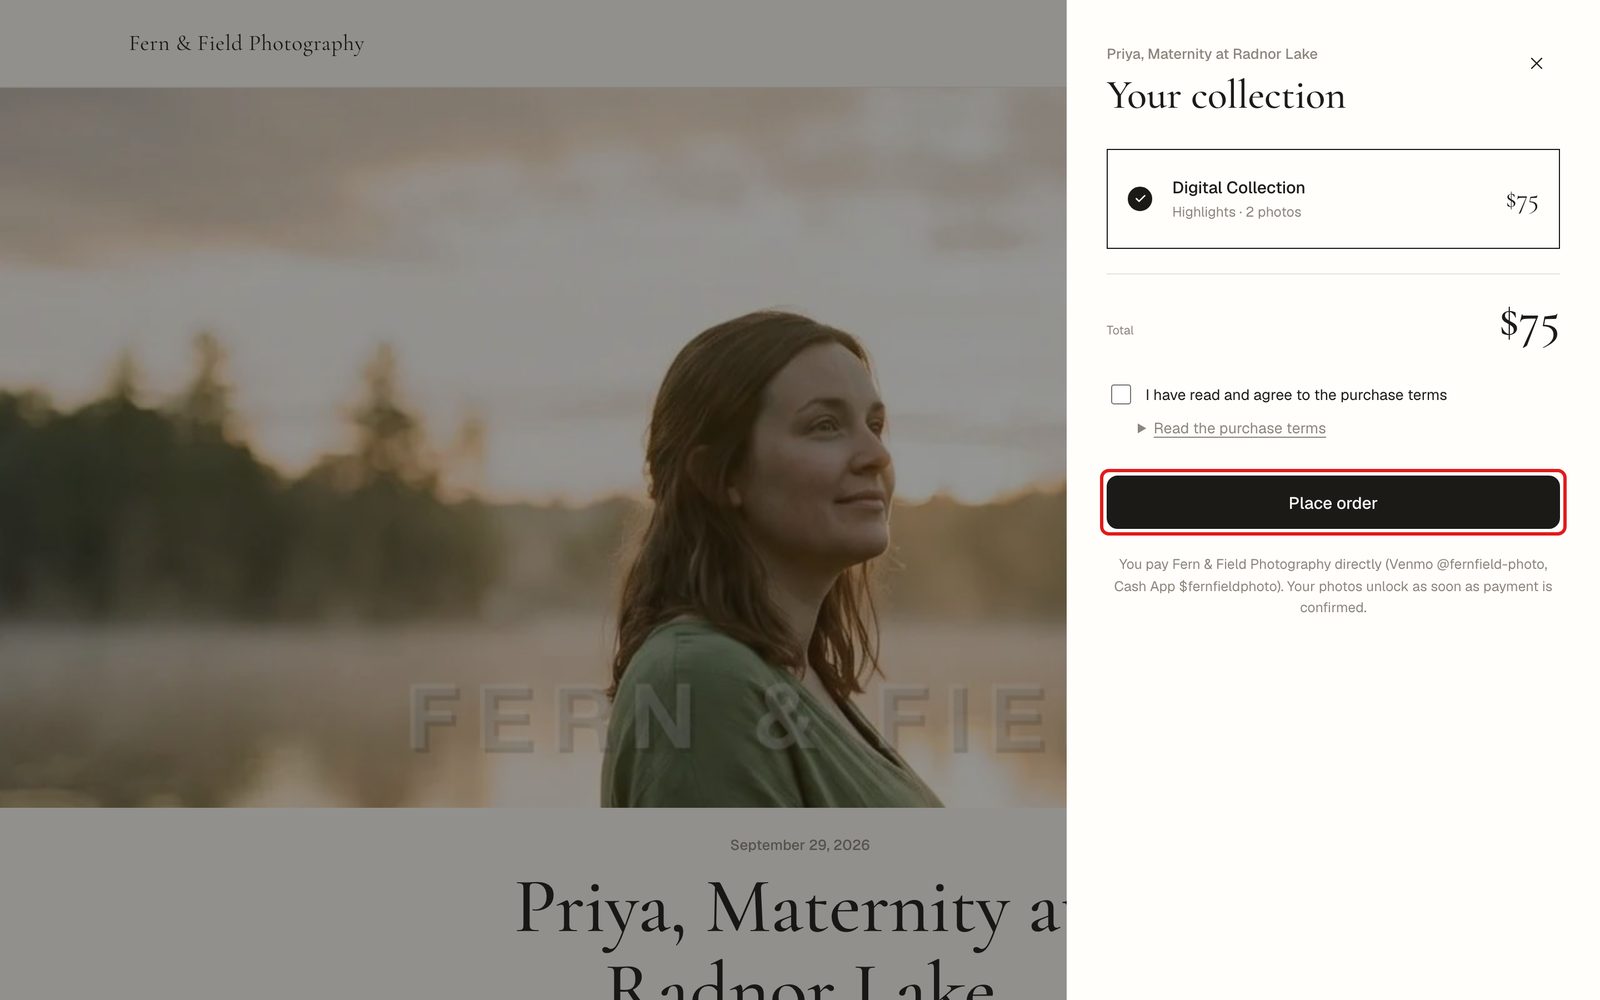
The client’s cart.
Good to know
Questions
Can I give the photos away?
Yes. Choose Included on the Pricing tab and everything unlocks for the client.
Can clients look without buying?
Choose View only. They can browse and pick favorites but not download.
Stuck? Email [email protected] with a screenshot, or open Support from inside HeyShutter.