Before you start
- The Medium Format plan or higher. Booking comes with Medium Format and up.
- STEP 1 OF 7
Write the agreement
Open Settings, Booking and find Agreements. Name it, then write the text or click Start from the sample agreement. Fill-in fields like {client_name}, {session_date} and {price} are filled in for each client. Click Save agreement.
Tip. Have an attorney review your agreement before clients sign it.
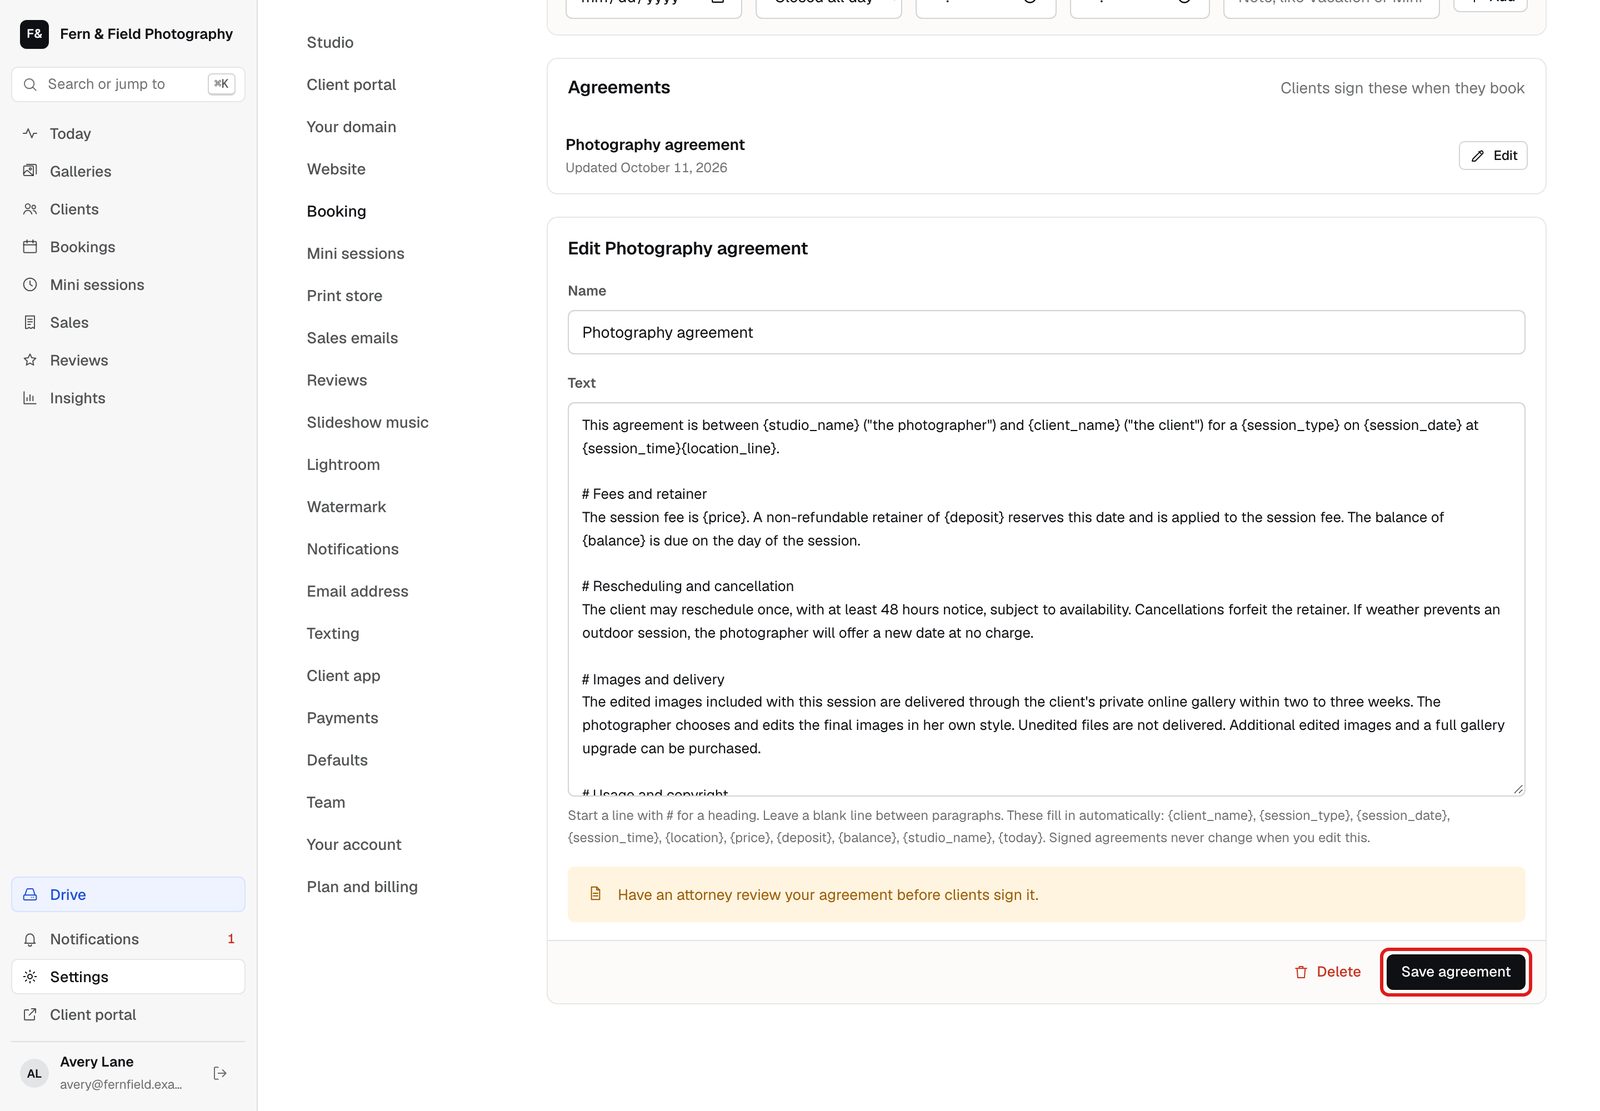
Settings, Booking, Agreements. - STEP 2 OF 7
Attach it to a session type
On the same page, edit a session type and choose the agreement under Agreement. Click Save session type. Clients who book that session online now sign as they book.
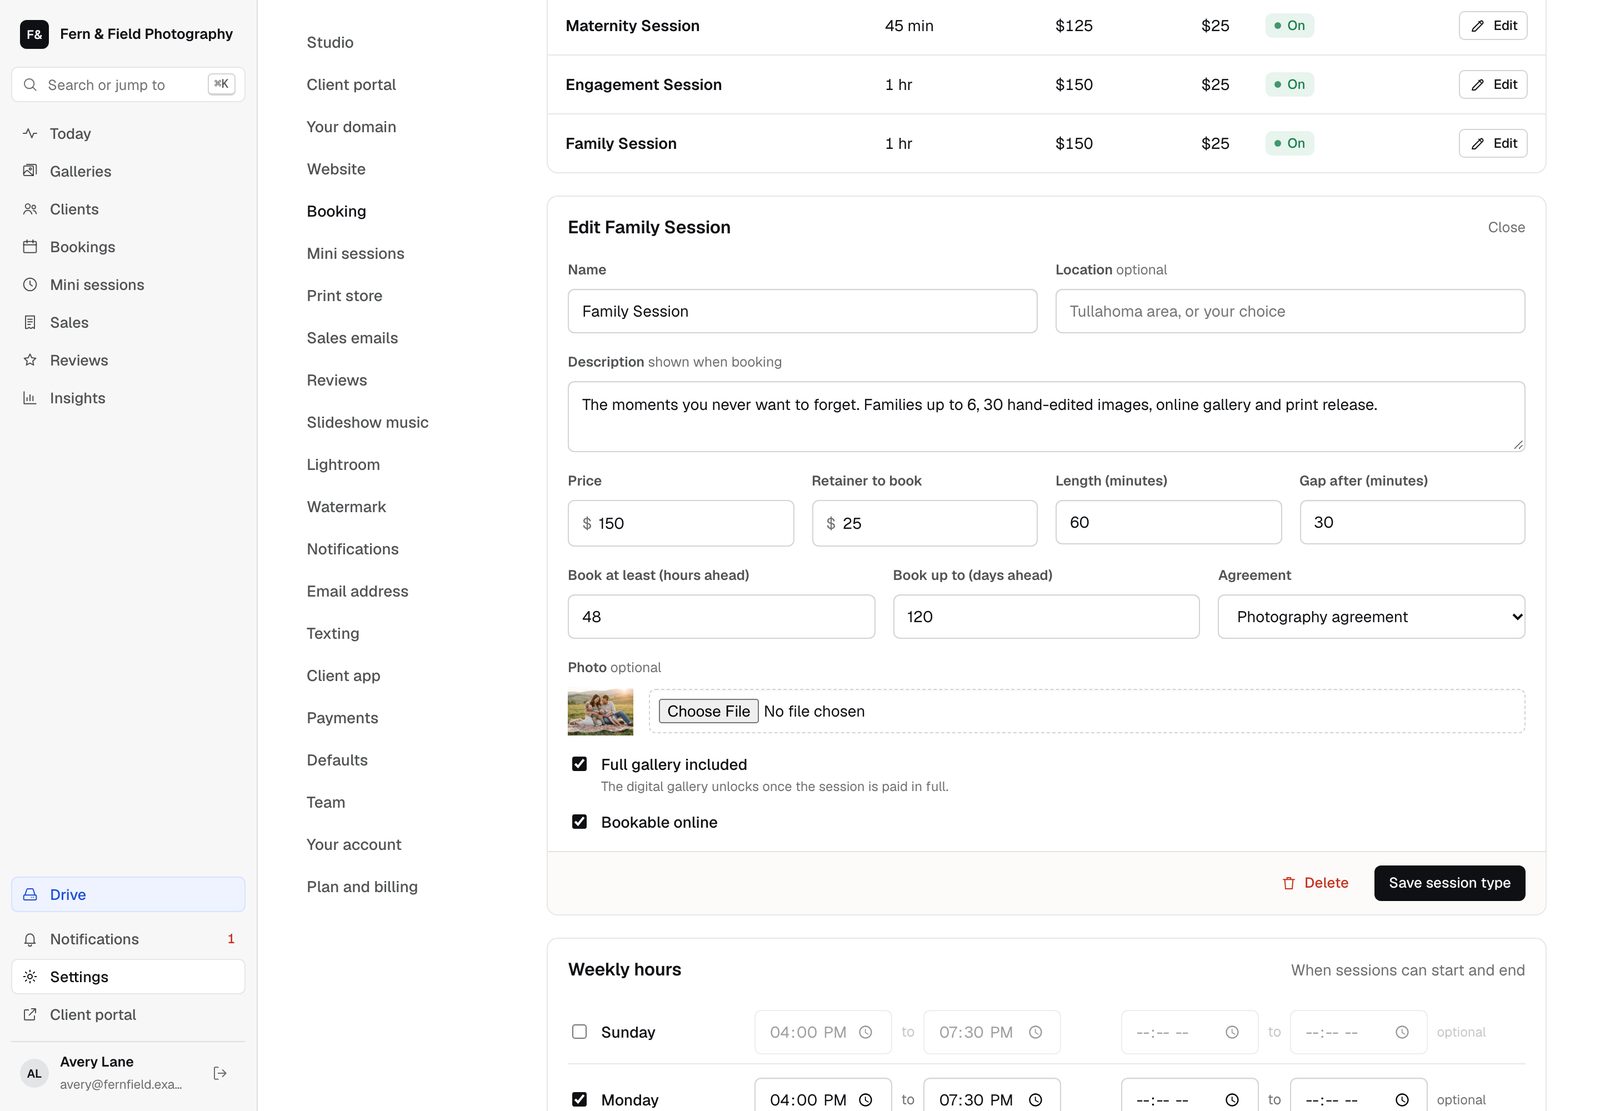
A session type with an agreement. - STEP 3 OF 7
How clients sign online
On your booking page, the last step is Review and sign. The client reads the agreement, types their full name and ticks I have read and agree to this agreement. Typing my name is my signature.
- STEP 4 OF 7
Booking someone yourself
On the Calendar, click New booking. Choose the session, date, time and client, leave Email the client ticked and click Book it. The client gets an email with a Review and sign button.
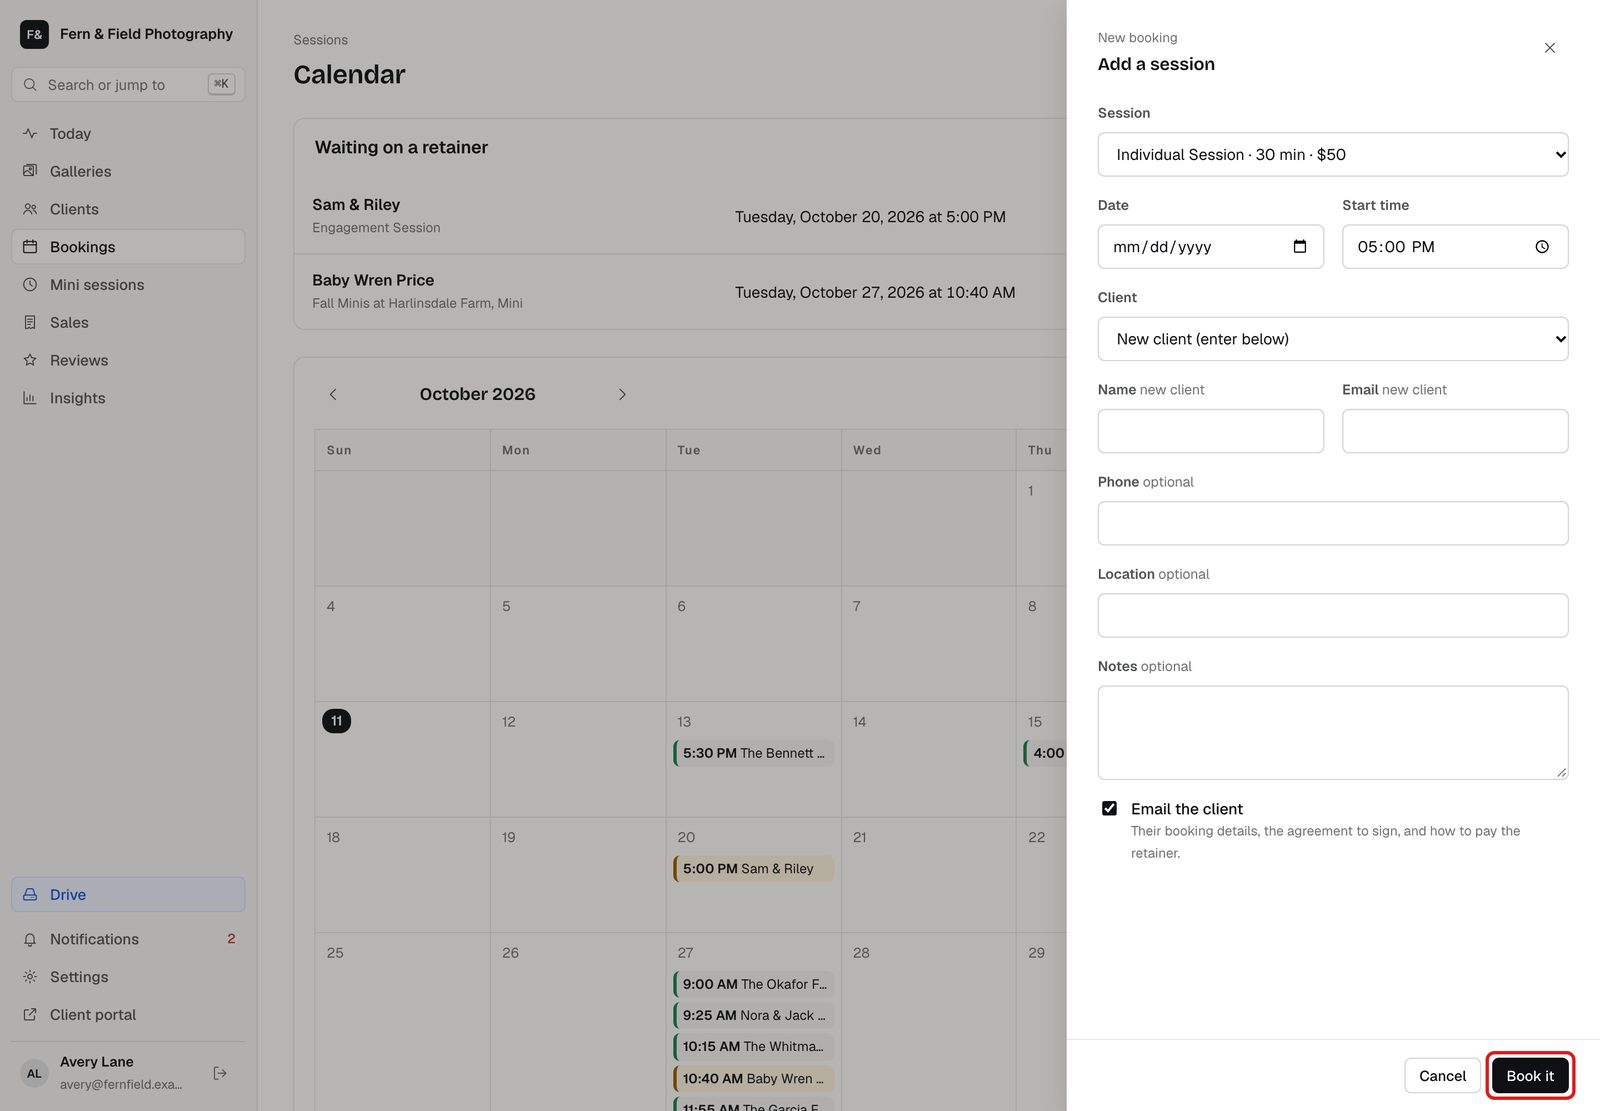
New booking. - STEP 5 OF 7
Send it again
Open the booking. While the Agreement card says Not signed yet, click Email it to sign.
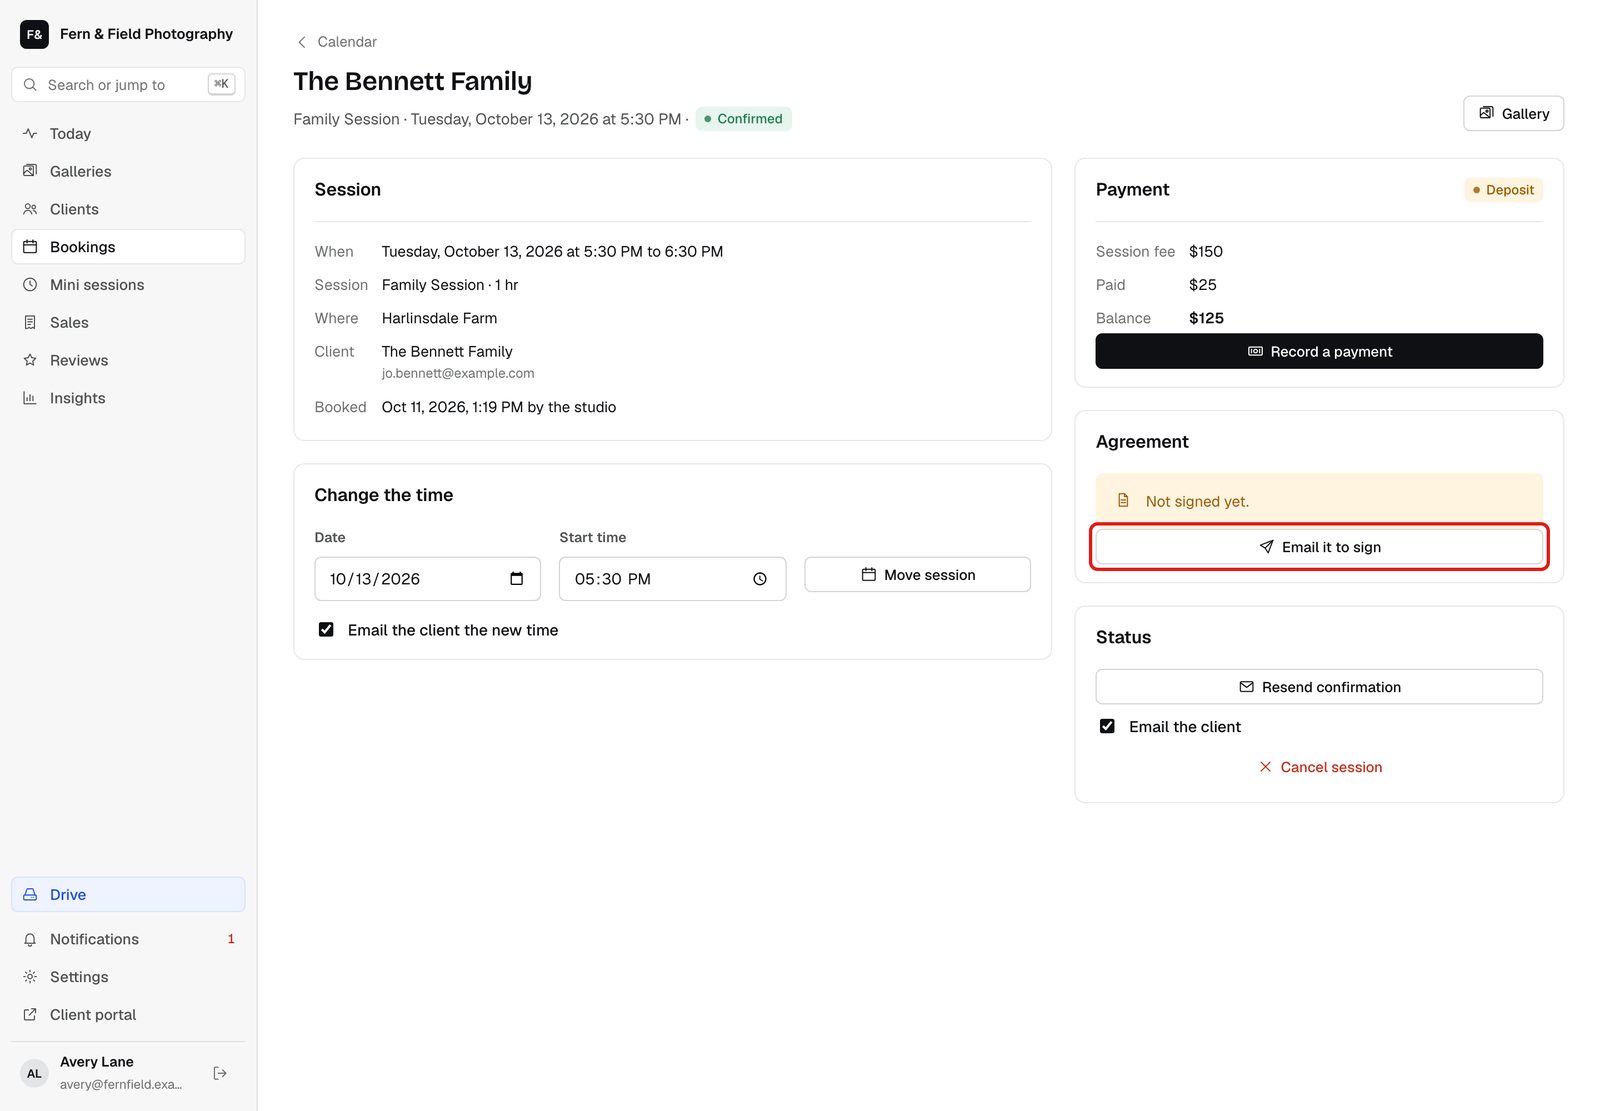
A booking waiting for a signature. - STEP 6 OF 7
The client signs
The client opens their session in your portal, reads the agreement and clicks Sign agreement.
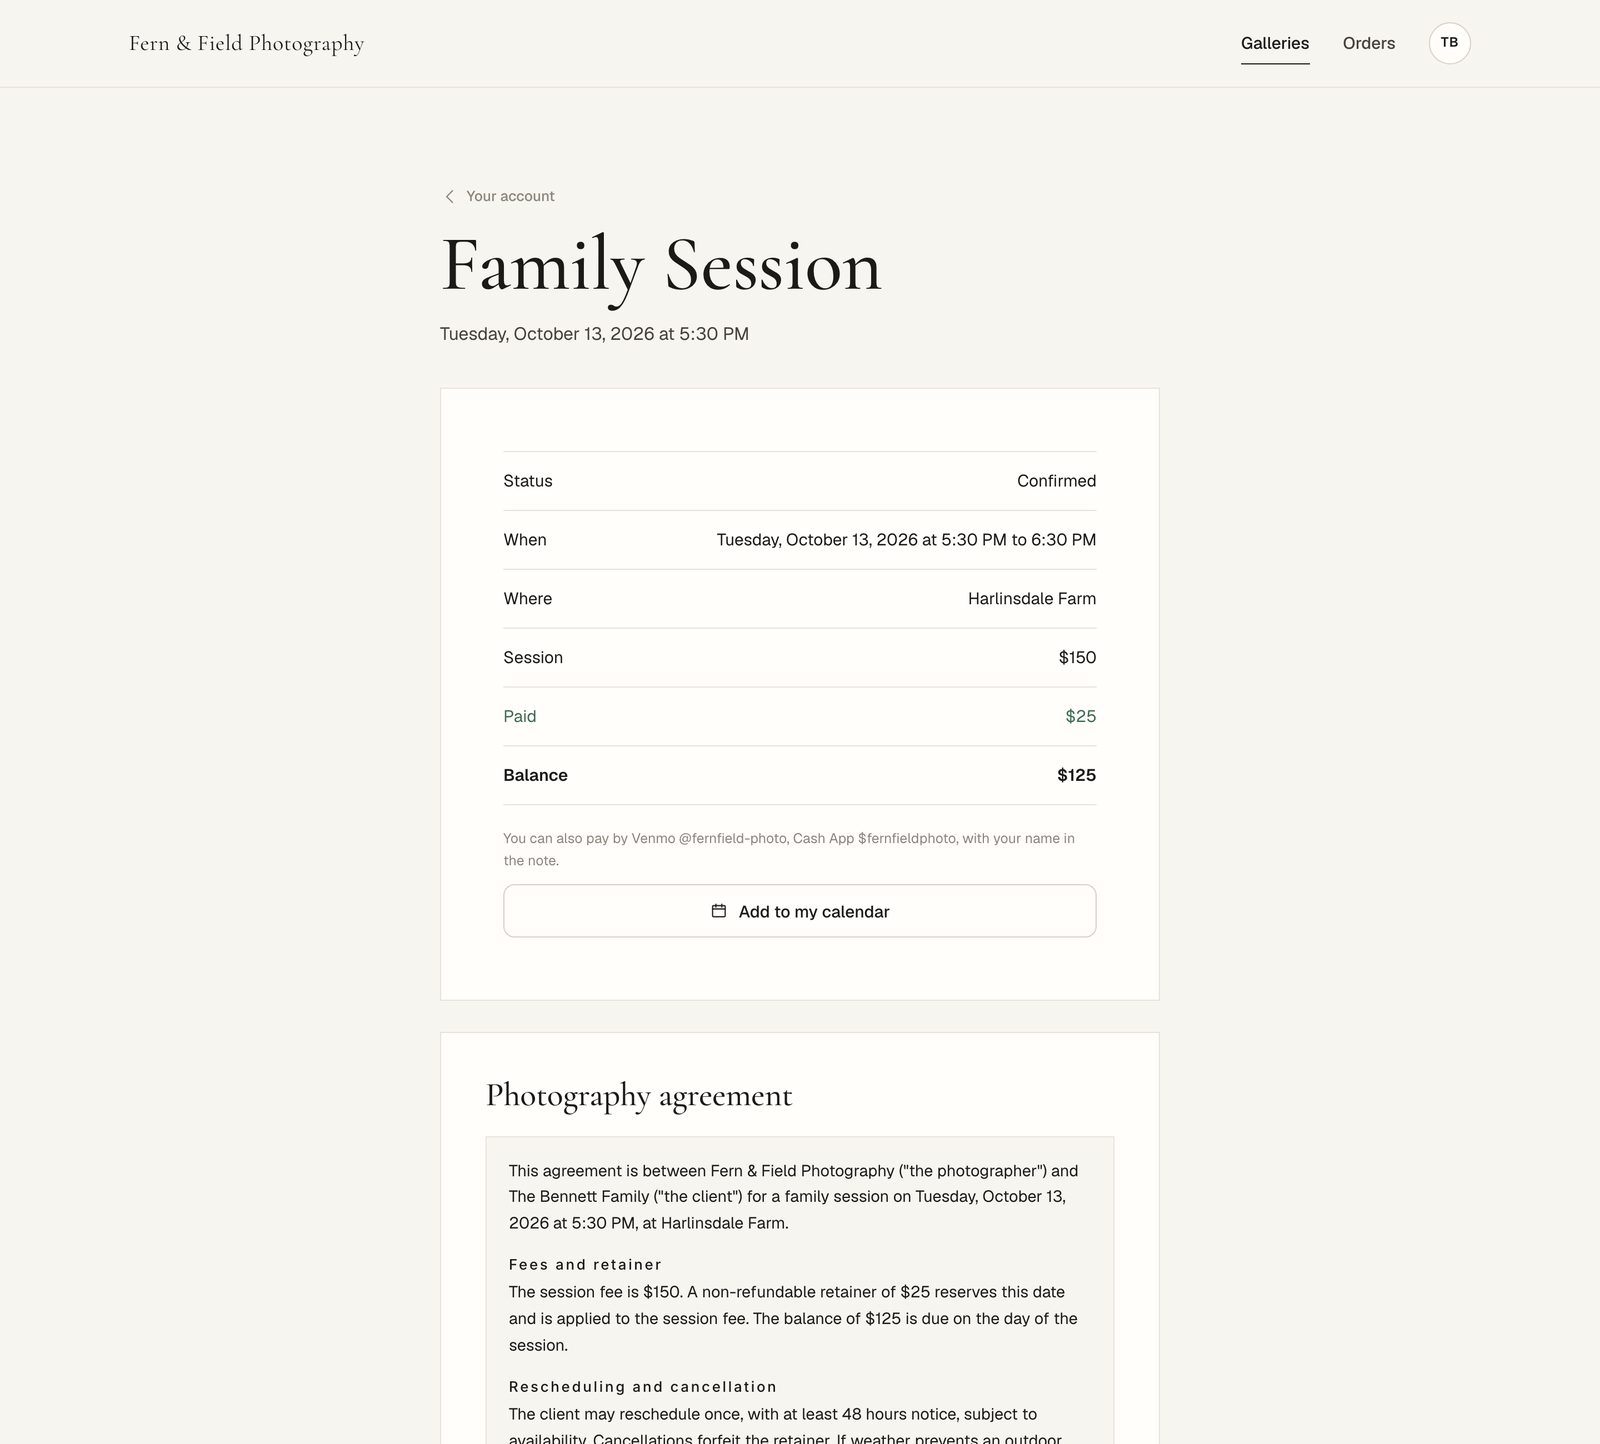
What the client sees. - STEP 7 OF 7
See the signed copy
Once signed, the booking shows who signed, when, and from where. Click View signed agreement for a printable copy with a fingerprint that shows it has not changed.
Good to know
Questions
Is a typed name a real signature?
Typed signatures are widely used for e-signing. Your attorney can tell you what applies where you work.
Can I have more than one agreement?
Yes. Make one for each kind of session and choose it on each session type.
Stuck? Email [email protected] with a screenshot, or open Support from inside HeyShutter.